|
IMPORTANT: Do
not overtighten the mounting hardware. There should not be an issue with this
hardware coming loose with the included nylon insert locknuts. Overtightening may
cause stress marks on the acrylic or breakage. Designs that have been broken or
damaged around the mounting holes will NOT be replaced.
IMPORTANT: Make
sure everything is secured when mounting the designs. If being used with the
Speaker Light Kit frames, make sure BOTH frames are attached and secured before
mounting the designs. You may also want to have some extra hands to help you hold things
securely when mounting them.
INSTALLATION is pretty straight forward:
You will need a socket driver with a 5/16" socket
and a small Phillips screwdriver. There isn't really a secret on how these
are mounted. They have mounting holes, the screws (included) go through the front of
the mounting holes. You may add spacers (included) behind the design if you would
like. The screws then go through the mounting area wherever you would like and then the
nuts go on the back of the screws. If you do not like the
positioning of the design you may have to try a bit to get them positioned where and
how you would like. When you get them positioned as you choose, carefully snug the locknuts
on the screws.
TIPS to make your designs look their
best:
These are designed to be used with backlighing. If they are used without the lighting, they
may blend in and not be very
noticeable at all, depending on the design and where and what they are being mounted
to.
Other factors might also affect how these designs look when mounted. The type of design
will affect the look, as well as how different types are mounted.
If you have a design that DOES NOT allow light to pass through the acrylic part of the
design (black, a mirrored design that is not etched, etc...) they can be mounted
in pretty much any configuration and what is behind the design will not really matter.
Spacers / No Spacers, Foam / No Foam... it really won't affect the look of the design. So
on these designs you can choose to mount these as you prefer and they should look as
intended no matter how it is done. If you do want the foam behind the designs, be sure to
put it down after the designs are mounted. After the designs are in the position
you want and tightened, you will then have to remove each light frame ONE AT A TIME and put
the foam in. It should lay on the the design's mounting nuts fine and then the light frame
will be remounted over the foam.
On the other hand, if you have a design that DOES allow light to pass through it, be it
from the acrylic being translucent or from the design having details etched in it, you will
want to consider what you have mounted behind the design.
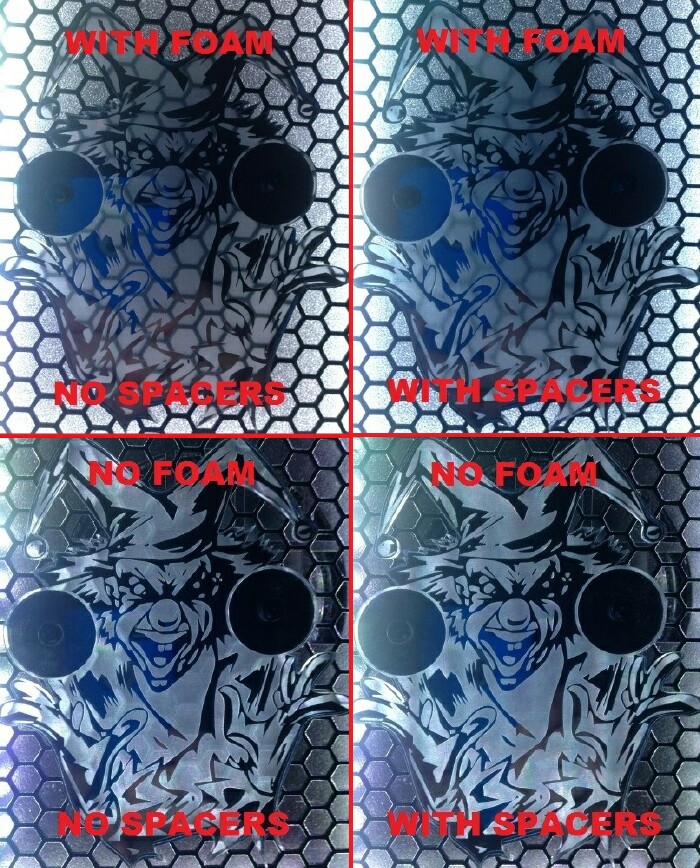
I have found that adding spacers (included) directly behind the design helps their
appearance, but even more so, you do not want to have any foam behind the design. The foam
does something to the backlighting that causes the mounting surface to show through the
design. This gives the design a dark, messy and cluttered look. As you can see from the
pictures below, the spacers help to clean up the look of the design, but having the back
clear (without foam) makes an even bigger impact on the look of the mounted,
backlit design.
|