Connecting to the Power
Switch on International SPIKE 2 Games
|
This mod includes its own power supply that is powered by connecting to the game's
Power Switch. The connection tabs for the Power Switch are located inside the game's
backbox.
|
|
First and very IMPORTANT is that you disconnect the
power cord from the back of the game's backbox. IT IS NOT GOOD ENOUGH TO JUST
TURN THE GAME OFF WITH THE POWER SWITCH.
|
|
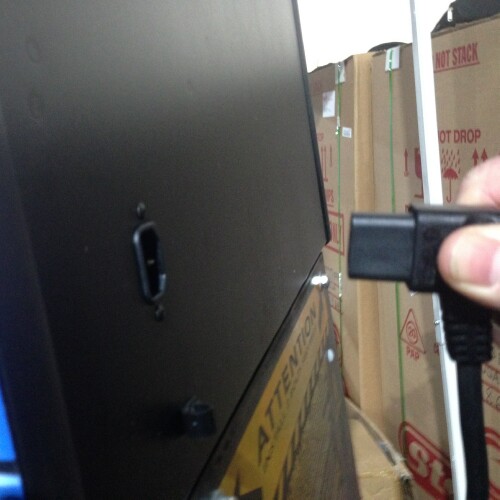
To get to the Power Switch connection tabs you will need to unlock and fold down
the speaker panel. Then pull the translite out of the backbox and put it in a safe
location.
|
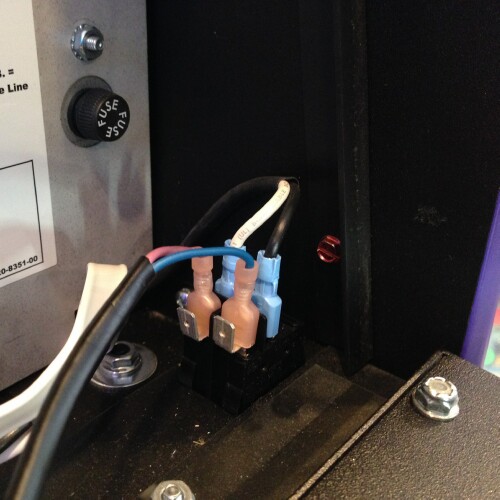
| The Power Switch is located in the bottom right side of the backbox. It is
important to take notice of how the Power Switch is positioned (one column of connection tabs
are in the middle and the other column of connection tabs are on the left side of the
switch) and what color wires are going to which connection tabs (the front row and back row
colors match). This picture is how I have always seen the Power Switch positioned and it's
wires connected (with the two columns of connection tabs toward the left side of the switch and
the black wires in the front row and the white wires in the back row). Having said that....I do
not work at Stern and I am not responsible if a worker has hooked up things differently. Even
if things are different, it should not make a difference if you take note of how things are
originally connected on your working game. As long as you are reconnecting the wires to the
tabs they were originally connected to, there should be no issues. |
|
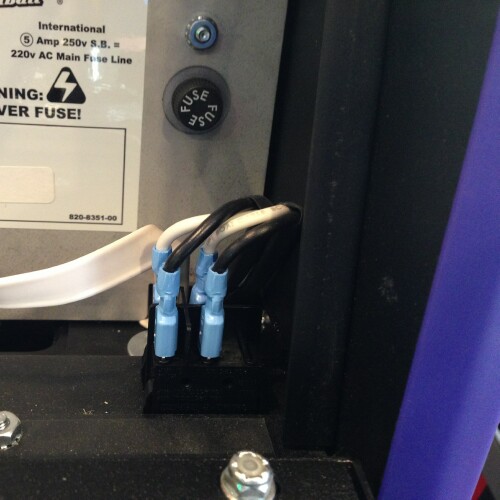
You will now want to slide off the two connectors on the outside column (left side in most
cases) connection tabs. Take care not to tug on the wire. Make sure you grip the area where the
crimp was from the factory. You can possibly do this by hand, but I have found it easier
to do with needle nose pliers.
|
| Now you have both of the original wires disconnected from the left connection
tabs. |
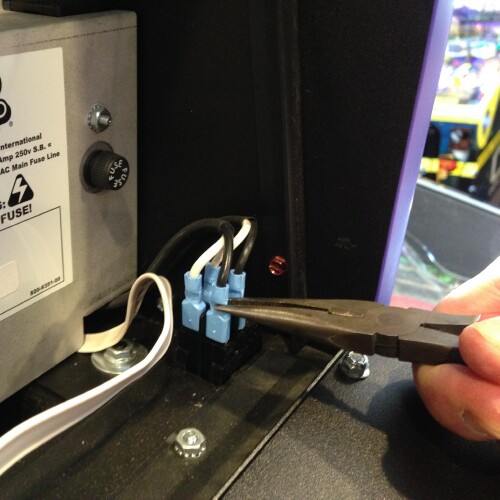
| You will now slide the connections that are on the end of the AC power cable
that was included with your mod, onto the two power switch connection tabs. Making sure that
you have their auxiliary tabs pointed outward (so the original power swich wires can later be
connected to them). It does not matter which of these wires from the mods AC power cable are
connected where. The power supply that is included with the mod is not polarized, so it does
not matter which wire is connected where in this case. You will also want to put another hand
on the game's power switch on the outside bottom of the backbox. As pressing these connectors
down onto the power switch's tabs often can cause the power switch to pop out of the bottom of
the backbox, as the switch is just pressed in there. So support the switch from the bottom when
pressing the connections on. If you forget and it pops out the bottom....just pop it back in.
That's the way it works. |
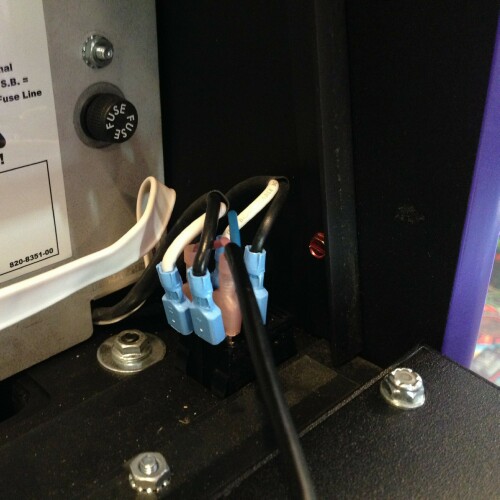
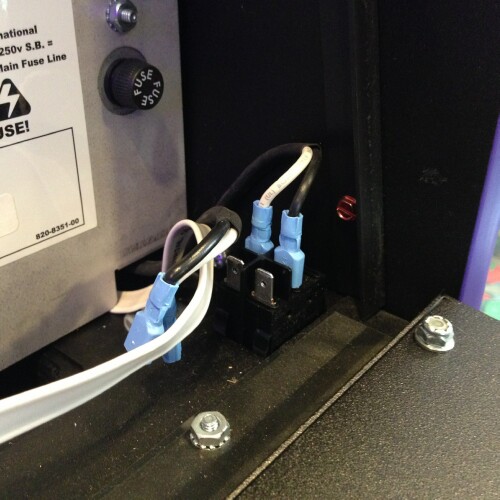
| Now you will reconnect the original power switch wires onto the auxiliary
connection tabs that are on the included power cables connections. Again...be sure to support
the bottom of the switch when sliding these connections on. The most important part here is to
make sure you are putting each of the original wires back onto the connection tab that they
were originally connected to. It should be so the colors match on each row. It should be
black on front and white on the back, BUT the main point is that you put the wires back to
the tab they were originally connected to. |
| You now have the other end of the, now connected, AC power cable to plug
into the included power supply. When everything is connected, it should be where the mod is
only powered on when the game is turned on. If you have any issues, like the mod always being
powered on, even when the game is switched off, please let me know at my support e-mail. |
Back to Flamin Frames Speaker Light Kit Install
Instructions
or
Back to Flamin
Frames (TYPE 14) Light Kit
|